Review an email subscription form’s setup
A connected website alone does not establish that its subscription form is visible. Review the form, its target list/site and the shop’s script setting together.
Find forms in eMailSense
- Open the eMailSense dashboard through Builder and choose Forms.
- Use the search, Published/Draft status, website filter and date/name sort to find the intended form. List and Grid views offer different ways to browse the same form directory.
- If there are no forms, use Create form or Create your first form to open the preparation dialog.
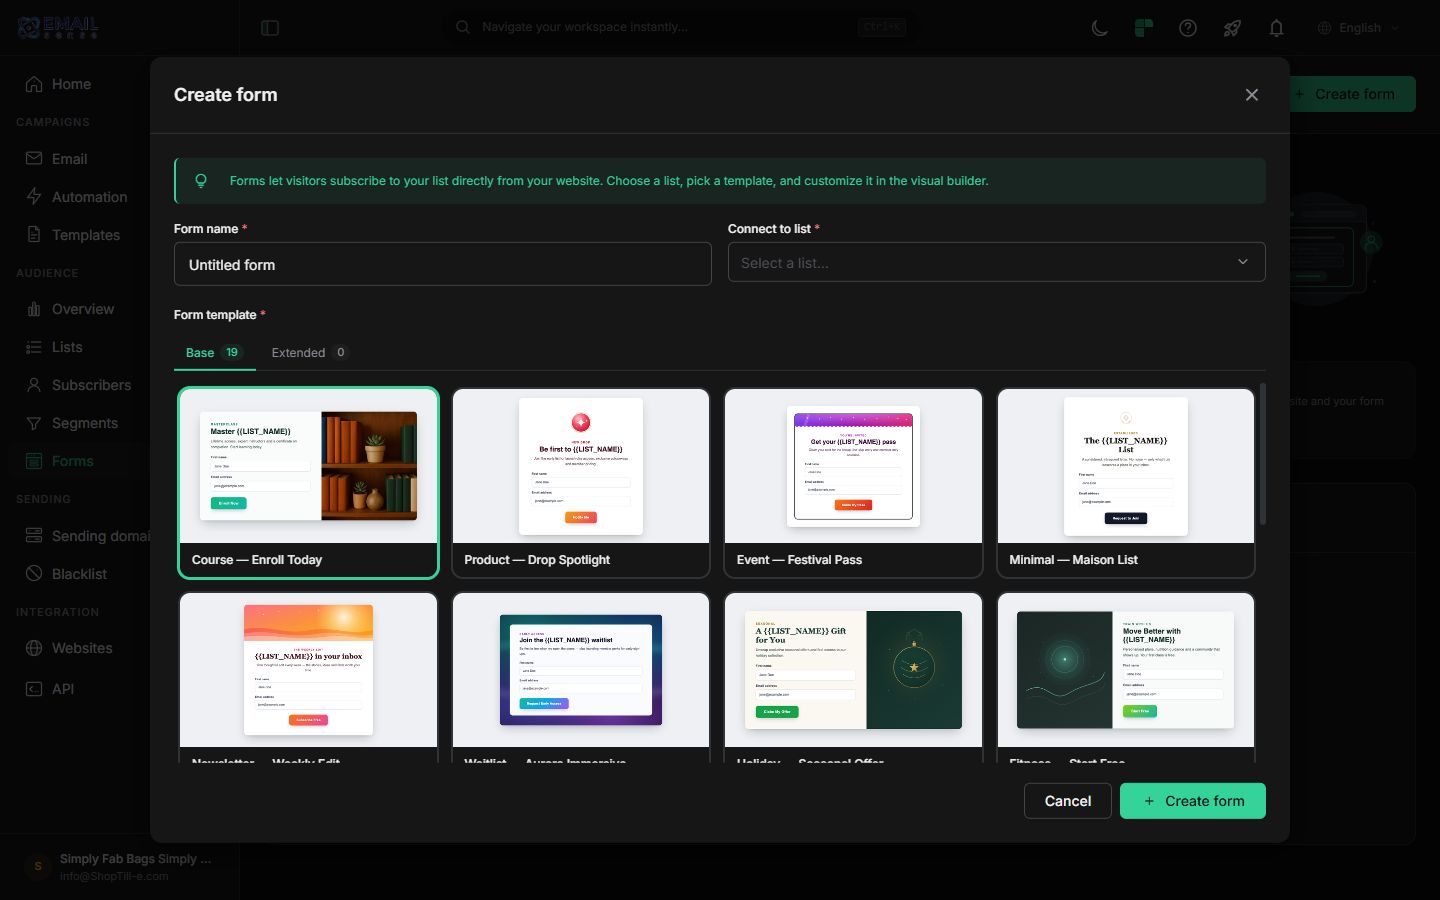
Prepare a signup form
- Give Form name a useful internal name, such as “Homepage newsletter signup”.
- Under Connect to list, choose the intended mailing list. Check its purpose before collecting new subscriptions into it.
- Review the Form template choices under Base or Extended. Choose a layout suited to the information you need and where visitors will see it; do not assume the initially highlighted card is the right design.
- Check the name, target list and template before choosing the dialog’s Create form. Use Cancel to leave without creating it.
- Review the resulting form’s design, fields, website connection and publication controls before making it available to visitors. Creating a form and publishing it are separate decisions.
Check the provider form
- Open the intended eMailSense account and identify the form and target mailing list.
- Review the form’s wording, fields, appearance and subscription/confirmation process.
- Check the intended connected website and the form’s current publication state.
- Check the selected site and target list before publishing a form to visitors.
Check the Builder script setting
- Open Global Settings → General.
- Find Add eMailSense Website Script in the online-shop settings.
- Review its Yes/No choice. An intended change uses the page’s save control and should be checked on the intended storefront.
- Compare the script setting with the provider’s actual connected/published form. They are separate controls, and the intended website must have a completed connection; enabling the setting alone is insufficient.
Before making the form available
Test the intended device sizes, display behaviour, field validation, subscriber destination and confirmation/unsubscribe experience using an email address you control. Use the provider’s current form-design and publication controls, checking the resulting form on the intended website.
If it does not appear
Check the correct domain, connected account, target list, provider form publication and Builder script switch before changing the design. Check a normal storefront page first; checkout follows a separate display path. Record the exact page, device and whether the form had previously been dismissed when asking support to investigate. Do not use Update your websites as a new-domain connection action.
Website connection · Target mailing list.
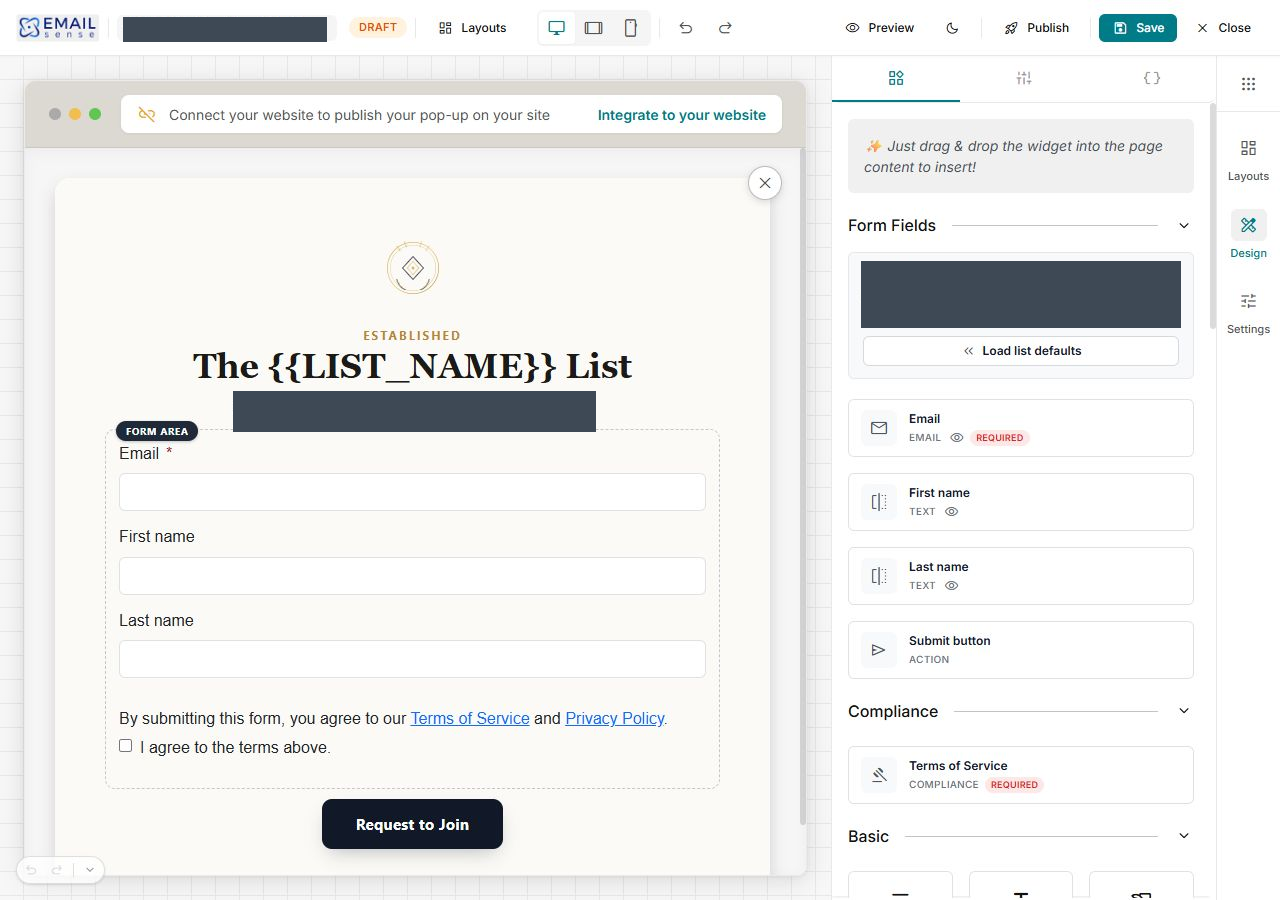
Save and reopen a draft form
- In the form builder, check the form name and DRAFT status.
- Open the Widgets sidebar. Its Form Fields section identifies the connected list and the fields available for that list.
- If the layout shows an empty form area, choose Load list defaults to populate it with the list's default fields. Check the inserted fields rather than assuming the starter layout already contains them.
- Keep the required Email field. Review the other fields and any consent wording or links for your intended signup process.
- Double-click the intended paragraph to edit its wording. Check the actual text on the canvas before selecting Save.
- Wait for Form saved successfully. Close the builder and check the same form in Forms. Reopen it to confirm the saved wording and fields.
Saving a draft does not publish it. Check the list's status and website connection separately; a form can remain Draft and Not connected after saving.
If the form cannot be saved
If Cannot save form reports that the form must contain an Email field, return to Form Fields and add the required field. Load list defaults can populate an empty form area from the connected list. Review the inserted result before saving again. A validation message means you must check and correct the form; it is not confirmation that the latest wording was saved.
Review the website connection separately
Integrate to your website opens Connect your site, with a website selector and a separate Connect action. The dialog explains that the popup will be shown on the selected site. Leave the selector unchanged and close the dialog when you are only reviewing the options. Choose a website and proceed only when you intend to connect this form. Publish is a separate builder control; check the actual site, status and visitor experience before making the form available.
For example, prepare the wording and required fields for a newsletter signup, save and reopen the draft, then review its privacy links and planned website before arranging publication. Never test a visitor subscription by entering a customer's address.
