ShopTill-e's ecommerce menus can contain links to anything e.g. products, categories, general content such as an about us page or T&C's or even another Website.
Depending on the ecommerce shop theme you have chosen for your Online shop there will be the ability to set-up and control different menus in different locations within your site.
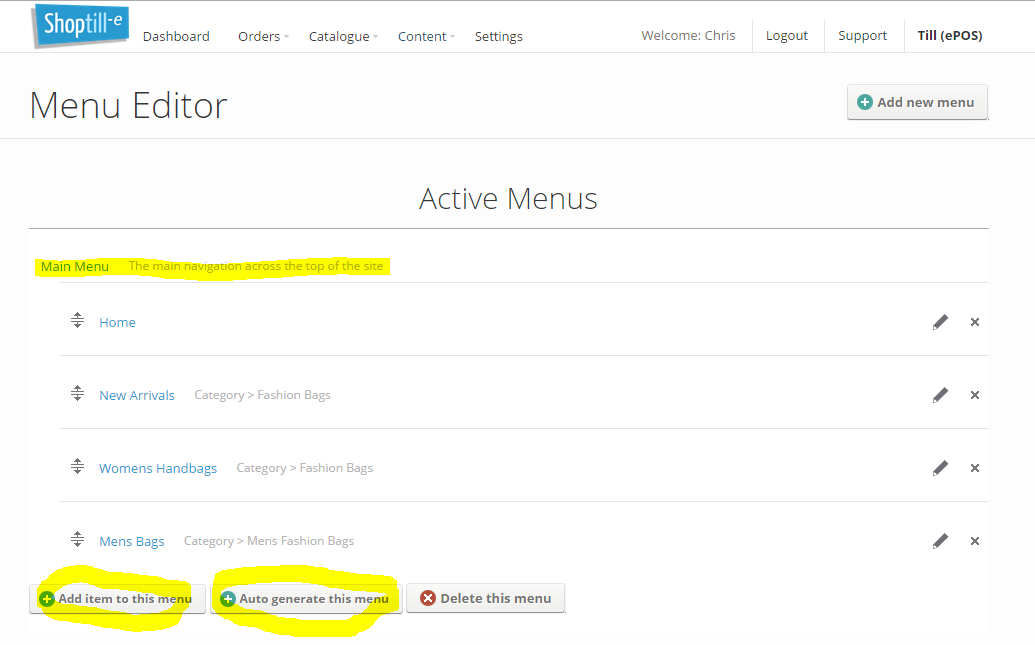
Most Online Shops will normally use the 'Main Menu' for their categories/departments [TIP: When using menu manager auto generate your 'Main Menu' with categories & remember to process sub categories ]
The ability to mix and match the types of menu items contained in the various menus gives you ultimate control over the way that you want your site to work. Menu manager will also allow you to name each menu link so you can enter anything you like as the text/menu link.
Menus are controlled within the content section of the admin system. Within each menu you can choose to selectively add/delete items or auto-populate the entire menu from pages, categories or galleries.
To add items to a menu, simply click on the 'Add item to this menu' link below the relevant menu. Each menu item is one of 4 types:
- Page - this is a link to one of your content pages (e.g. the 'about us' page)
- Product - this links the menu item to a single/specific product in your shop
- Category - this links the menu item to a category in your shop and will show a list of the products in that department
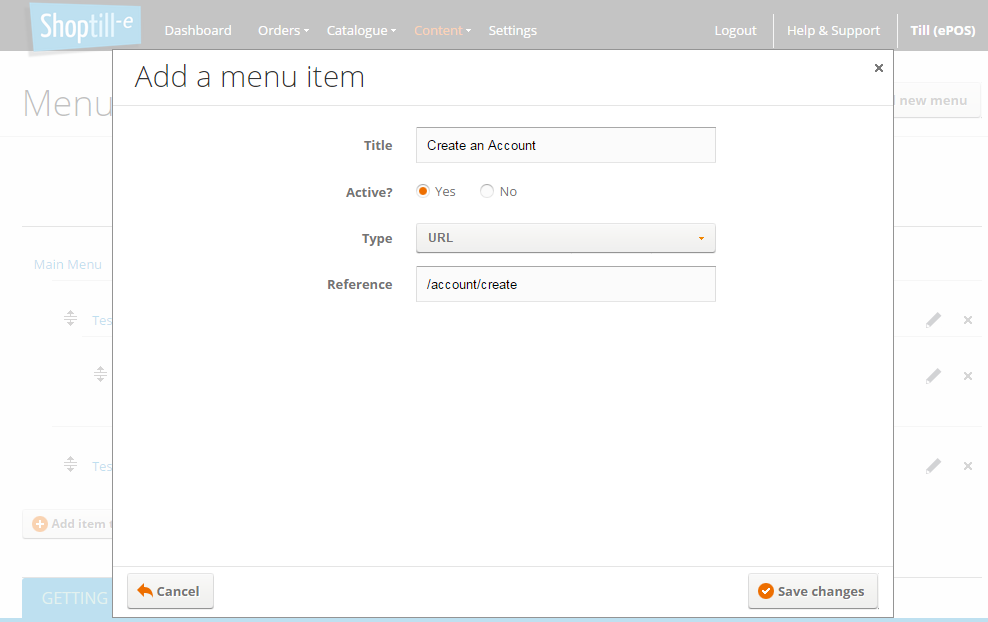
- URL - to link to any URL/page even an external site, use this option and enter the full URL in the text box provided
[TIP: To link a menu item to your homepage add a menu item select URL and just enter a forward slash / for the URL]
Auto-Generate Menus:
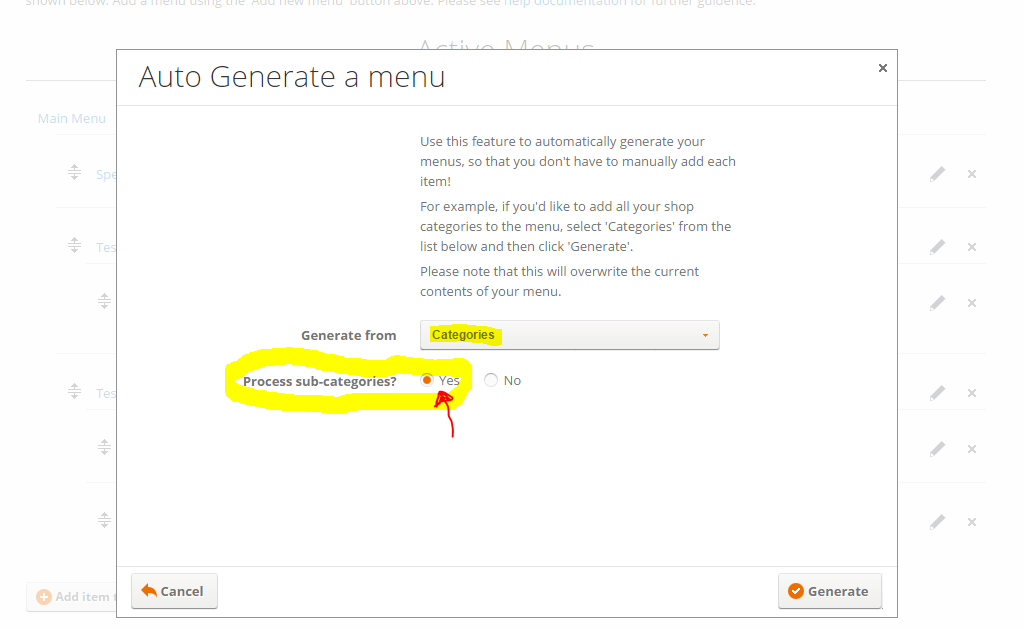
The auto-generate button is really useful if you know that you want the main menu to link to your departments/categories for example, simply click the Auto generate this menu option and select categories the system will then add all of your top level departments to the menu...
 Process sub-categories
When Auto Generating the main menu using categories remember to 'Process sub-categories' as if your template as a drop down menu this will generate all of the sub menus (
you can see drop down menus working in our Adventurous theme). If your template doesn't have a drop down menu, the sub categories will be shown in the product listing pages as sub navigation:
Available Menus
Each ecommerce website theme has various menu areas that are available so you can have the main menu for your shop departments/categories for example and the a footer menu for your about us, contact us etc or you can mix them i.e. have a mix of general content pages linked from a menu and categories/products.
If you used the fast track set-up in the 'Content > Menus' page you should already see some Active Menus as these are created as part of the fast track set-up process.
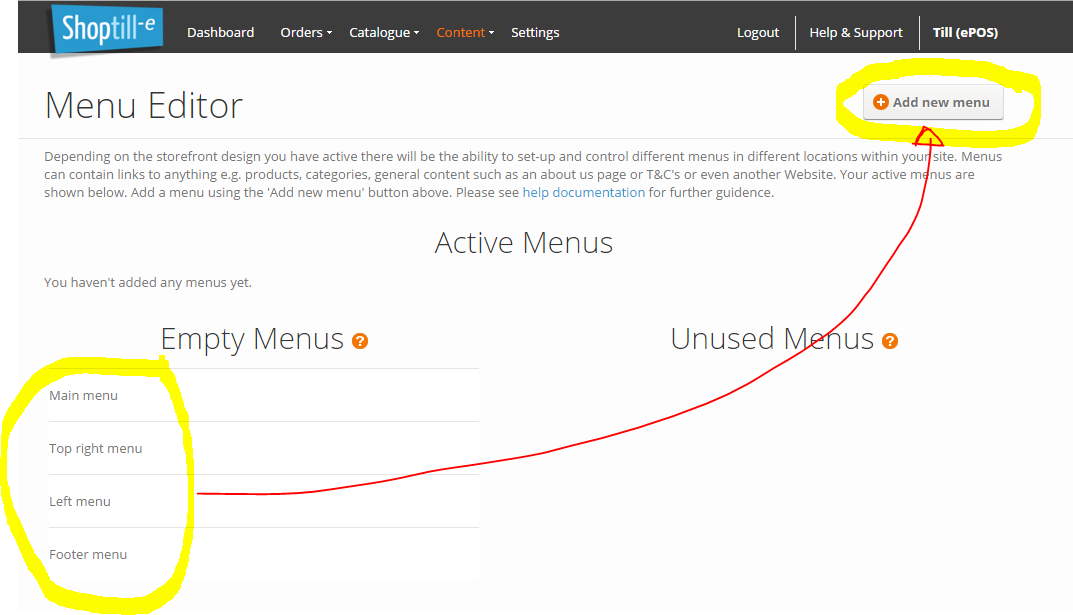
However at the top right of the screen you will see an add menu button click this and it will show you the menus that are available for the template or theme that you have available in your current ecommerce shop template that are not active. You can select and add one of these then once it's active you can choose/select the menu items to add to it.
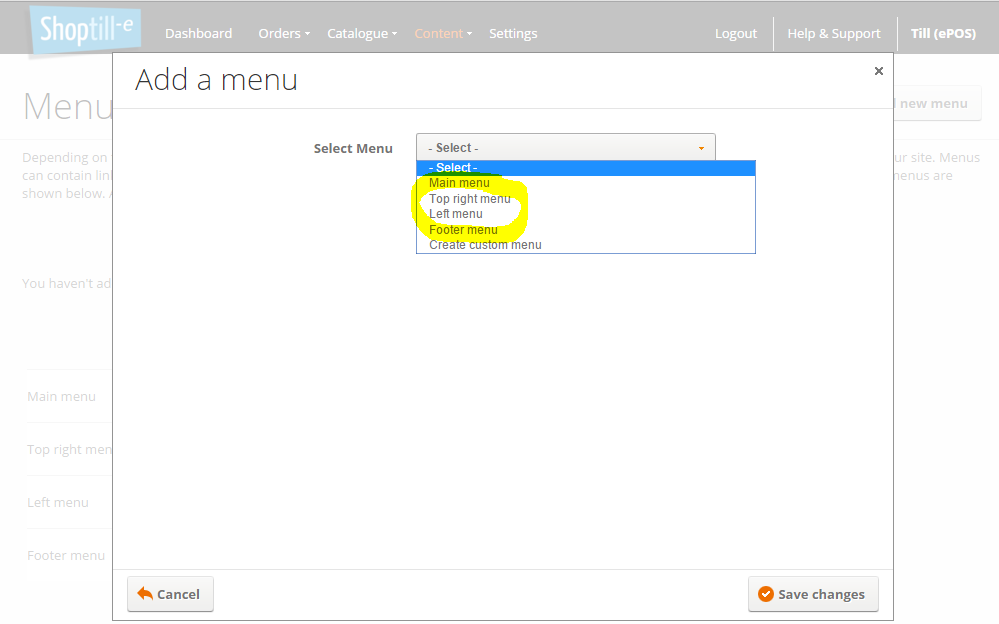
Inactive menus are shown as 'Empty Menus', these are menus that are available in the template which you've not enabled and are therefore empty. To use one of these menus you need to enable it by adding it into the menu manager. To do this click the 'Add new menu' button:
In the next screen select the menu you want to use/enable from the drop down list and click the 'Save changes' button, the menu will then be enabled and you can add items into the menu as described above:
We normally suggest that the main menu should be categories and the footer or other menu will then link to your general content however the choice is yours.
Menu links to create an account / log-in
If you want customers to be able to create an account before checking out (you can see this set-up and working in our Adventurous theme ) all you need to do is in one of your menus add an item that links to the URL:
/account/create
Something like 'Create an Account' linked as URL to /account/create
If you want to let them log-into their account with another menu link to:
/account
Something like 'Account Log-in' linked as URL to /account