
Prepare your email sending domain
Use the domain belonging to the intended From address when preparing email marketing. A connected WebShop and a verified email-sending domain serve different purposes.
Find and review a sending domain
- Open the eMailSense dashboard from Builder and choose Sending domains.
- Use the search, Verified/Unverified status filter and date/name sort to find the intended domain.
- Open its name to see the authentication details. Compare the domain in the heading with the domain used by your intended From address.
- Read the DNS records table: Type, Host / Name, Value and Status are separate fields. Follow the records generated for your domain; do not copy values from another shop or screenshot.
- Check each record’s result as well as the overall domain status. Use Verify DNS records after an intended setup or correction, then review the returned result.
Prepare a domain addition
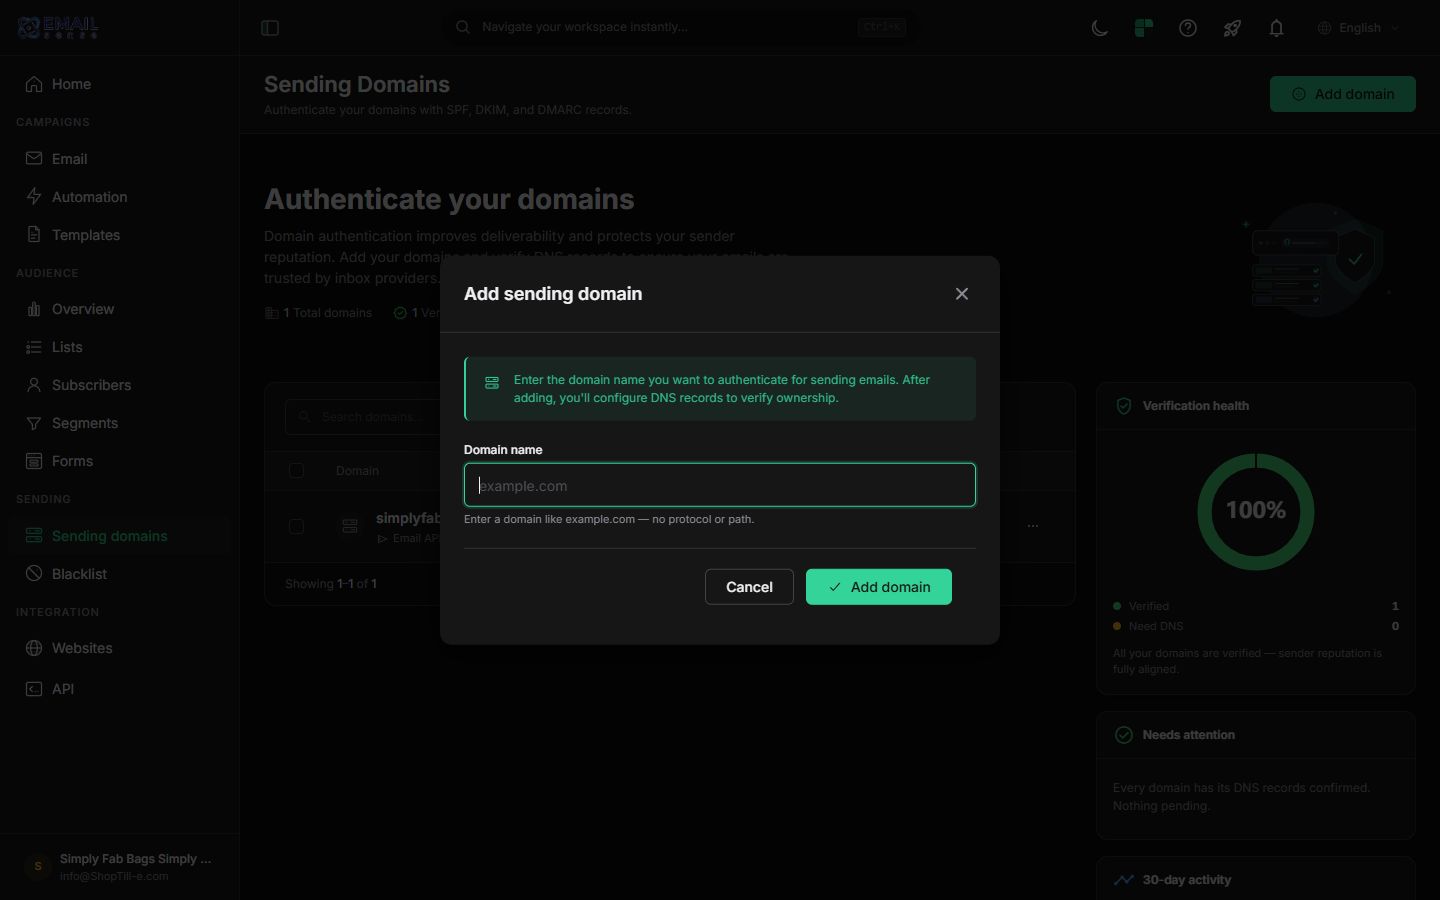
- From Sending Domains, choose Add domain.
- In Domain name, use the bare domain, such as example.com, without https:// or a page path.
- Check that it is the intended sending domain and that the person managing its DNS can complete the setup.
- Choose the dialog’s Add domain only when you intend to create that domain record. Use Cancel to leave preparation without submitting.
- Review the actual required records and verification state after the intended addition; entering a domain is separate from completing authentication.
If assisted DNS controls are unavailable
The detail page can show Preview DNS changes and Add missing records. If unavailable, ask support to confirm the supported setup for your exact domain and DNS provider. Keep existing mail and website records available for review. Do not assume this assistance configures every kind of DNS record or replaces a complete verification check.
Gather the details
- Identify the intended From name and email address. For example, an address such as news@example.com uses example.com as its email domain; a website URL such as https://www.example.com is a different form of address.
- Confirm who manages the domain’s DNS and who can approve changes.
- Open the intended eMailSense account through Builder’s dashboard link and review its current sending-domain status.
- Record the exact domain, required record names/types/values and current verification results for that account. Keep credentials out of support screenshots.
Before changing DNS
Check the existing records and the instructions supplied by the current service. Confirm whether ShopTill-e manages the domain and whether an automatic setup option is actually available for it. Preserve existing mail and website settings; ask the domain administrator to review required changes if ownership or conflicting records are unclear.
Check the result
After an authorised change, use the current service’s verification check and inspect each required result. A saved record or a connected website does not establish that sending-domain verification passed. Record pending or failed results for support rather than repeating changes without checking them.
If verification remains pending
Provide the domain, record type/name, displayed result and time of the change to the person managing DNS. Have them compare the actual records with the service’s required values. Avoid promises about a fixed completion time or guaranteed inbox delivery.
Prepare a campaign · Review the separate website connection.
