ShopTill-e Help Assistant
Online

First, you need to create the pop-up form that will be shown in your WebShop. To do this within your eMailSense dashboard go to 'Lists' > 'Forms' and click on the '+ Create form' button. In the next screen enter a name for your form e.g. WebSite Subscribers then select the mailing list where you would like your Website subscribers to be added.
Next, choose and select one of the form templates and then click on the 'Start Design' button. Now customise the form by adding the text and images etc that you want displayed to your customers, matching your website's aesthetics to encourage visitors to subscribe. This works very similarly to the Builder PRO editor described above in campaigns.
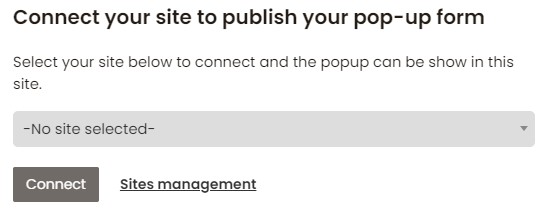
Once you are happy with the form you need to 'Integrate to your Website' and this allows you to select the site that you would like the form to be shown in; if you have multiple Websites all connected site sites will be listed and click connect.
IMPORTANT: There are 2 things you now need to do to ensure your form is displayed in your WebShop
1. Publish the form in your WebShop using the "Publish" button at the top right of the editor.

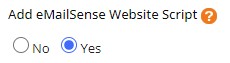
2. There is a master setting within your ShopTill-e Dashboard that gives you overall control to enable or disable the showing of eMailSense pop-up forms within your WebShop/s. This is in "Global Settings" > "General" this is a master control that includes or excludes the popup script from being added into your WebShop set this to "Yes" and save the page if you wish to enable the pop-up script/form in your WebShop: